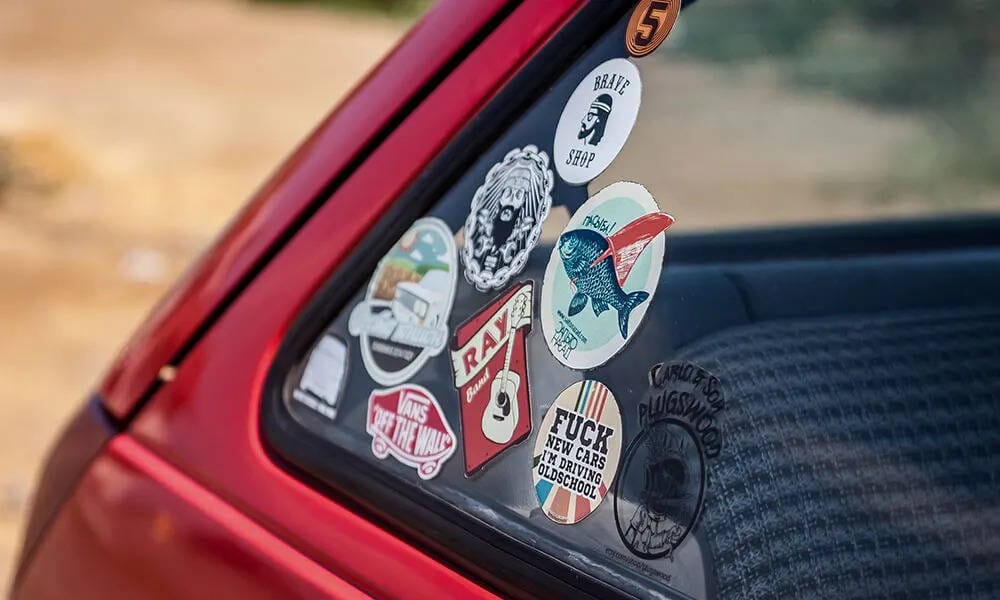
Stickers are a quick, cheap, and easy way to add some individuality to your ride. Whether they’re for style, a political bumper sticker, or a (hopefully friendly!) message to other road users, stickers will get your message out there.
But tastes, styles, and political agendas can change, and the decals that used to send all the right signals might have started to show their age. Alternatively, maybe your vehicle’s previous owner wanted to say something that you don’t!
Unfortunately, removing them without the right know-how can take a lot longer than the few seconds they took to apply. Even the supposedly temporary decals from a dealership can leave a mess unless dealt with properly.
However, by the end of this article, you’ll know exactly how to blitz these outdated decorations! And, as a bonus, we’ll tell you what you can do before applying a new sticker to make it easier to remove later on.
Let’s learn what the best sticker removers are.
Carefully formulated to ATTACK the stickiest substances, Sap Attack gets rid of stubborn tree sap, tough tar, old bumper stickers, bugs, gum and asphalt. Works quickly to break down the contaminants and allow for easy removal.
The Problem - Why Is Removing Car Stickers So Hard?
The longer a sticker has been in contact with your paint or glass, the harder it will be to remove. Over time, the glue degrades and becomes less flexible, creating an increasingly solid bond with the car’s glass or paint. Even if you remove a sticker, the glue often leaves behind a dirty residue that’s guaranteed to spoil the look of your ride.
Another common issue is that any wear and tear from the outside environment won’t touch the area hidden under decals. If the sticker is on glass, it isn’t likely to be an issue. However, on paintwork, there can be a noticeable difference between the paint that has been exposed to daily wear and the untouched paint hidden under the sticker. After the sticker is removed, the outline between the two sections can become uncomfortably obvious.
Of course, we hope that, with the help of our purpose-made products and the pro tips here on our Torque Detail blog, your paintwork will have always remained pristine! But if not. don’t worry, we have a solution for that too.
Removing Dealership Stickers And Others: Your Best Bets
Listed below are the most effective options for getting rid of those unwanted decals.
Before we start, two rules apply to all of these methods:
Firstly: Take it slow! Rushing the process can, at best, double your work by ripping the stickers into small, hard-to-manage pieces, and at worst, tear a chunk off your clear coat when you pull the sticker away!
Secondly: Any time you’re removing a sticker from paintwork, always finish the job with a good wax or sealant. The removal process can scrape away or dissolve this protective layer, so reapplication is vital for keeping your ride safe. Our favorites are Torque Detail Mirror Shine and Ceramic Spray. Either one is guaranteed to give excellent protection and a premium gloss finish.
After using any of the methods below, there may be some glue residue left behind. Don’t worry - a few sprays of Turbo Waterless Detailer and a wipe with a microfiber towel should lift any remaining residue. If the glue is particularly stubborn, read a little further to find out how to use solvents to finish the job.
The Key To Removing Stickers: Quick Detailer Spray + Razor Blade
Let’s start with stickers attached to glass.
Glass is far more scratch-resistant than paintwork, so it’s safe to use an old-style double-edged razor blade to work window stickers loose. Never use a razor or metal tools on paint!
- First of all, give the sticker and surrounding area a good spray-down with a waterless detailer. You can find our five-star rated Turbo Waterless Detailer here.
- Wipe the area clean with a microfiber cloth and then spray again. Let the lubricants in the detailer sink into the sticker’s glue.
- After the detailer has had time to loosen everything up, take your razor blade and carefully slide it between the sticker and the glass. Don’t be tempted to rush it. Pushing too hard is likely to slice through (instead of under) the sticker, and a slip could easily lead to a scratch on your glass - or a nasty gouge in your hand!
IMPORTANT: Don’t use a razor blade on the inside of heated windshields. It could cut the tiny electrical wires and leave your heating elements useless.
Alternative Method: Heat with a Hairdryer / Heat Gun
This is probably the most common method for removing stickers. Here’s how you do it properly and avoid damaging your gorgeous paintwork!
Heat will loosen the bonds in the glue, breaking that cement-like hold and making it more flexible. The flip side is that too much heat will cause your paintwork to bubble up. Bubbled paint is a big job to repair! So, we need to apply enough heat to break down those glue bonds, but not enough to damage your paintwork.
You might see some people attempting this with a heat gun - and yes, it’s possible to do so safely. However, the risks are high. Heat guns produce far more heat than we need, and applying just a little too much can have disastrous results!
Instead, we recommend a good old-fashioned hairdryer. Not only is it much safer for your paint, but it also means you don’t need any specialist equipment.
The Method:
- Give the area a quick clean with car shampoo or waterless detailer.
- Take the hairdryer and set it to high heat. Hold it around four inches away from the sticker and gradually warm it up for at least a minute. If it’s the right heat, you should be able to hold your finger against it for a second or two before it burns.
- Work on a small area at a time. Maintaining enough heat across a large area is difficult, if not impossible. For removing letters or numbers, this is easy: just take it one character at a time. If the sticker is a single large piece, work from one edge and get that unstuck before moving along to the next area.
- Once it’s hot, take a credit card and use it to gently peel away the edges of the sticker. They should come up fairly quickly. From there, just work across the sticker until it’s all gone.
Alternative Method: Freeze with an Ice Pack
The opposite of the previous method! Using ice will freeze the glue. Once it’s frozen, it will become brittle and can be chipped or snapped off more easily.
The Method:
- After washing the area down, take a handful of ice and wrap it in a thin cloth. Hold it against the sticker until you’re sure that it’s completely frozen.
- Then, take your credit card and pry the edges of the sticker up. This method can be slightly hit-and-miss depending on the glue that the sticker uses, but hopefully, it will chip away in sharp chunks.
Alternative Method: Using Solvents or Rubbing Alcohol
Solvents will get the job done. Fact.
However, be sure to treat them with extreme caution.
Rubbing alcohol, white spirits, petrol, or white vinegar all have the power to dissolve the glue that holds a sticker in place. But they also have the power to dissolve your sealant or wax, your clear coat, and your paint!
All four are safe to use on glass. However, petrol and white spirits are notorious for destroying paintwork, so avoid them for any bodywork jobs. Some people do recommend vinegar, but it’s an acid (pH 2.5), so it can still eat into your paint.
The only solvent we would ever use on paintwork is rubbing alcohol that’s been diluted to around 10%-15% strength. A higher percentage than this can soften your clear coat.
You could theoretically use this method to remove a sticker entirely. However, we strongly recommend that you only use it to deal with glue residue that’s left after using one of the previously mentioned techniques.
The Method:
- To achieve the correct strength, first check the percentage of isopropyl alcohol in your rubbing alcohol bottle. Dilute it according to the manufacturer’s ratios until you reach 10%-15%.
- Dab a little of the mixture onto a clean microfiber towel and gently work it over the sticker residue until it has loosened enough to wipe away.
- Immediately afterward, rinse the area down. A rinse will prevent the alcohol from dissolving any more of your wax or sealant than is absolutely necessary.
How to Stop Stickers from Leaving an Outline
As we mentioned earlier, stickers will protect the paint underneath them from any wear, scratches, or fading. When they are removed, it can reveal an ugly contrast between these areas and the unprotected sections next to them.
The good news is that this is completely avoidable!
The solution is to minimize this damage to your paintwork and keep it just as pristine as the paint that’s protected by the sticker.
We can’t cover all the details today, but here’s a quick overview of what you can do:
- Two-bucket method washing: This massively reduces the swirl marks caused by regular washing.
- Park out of direct sunlight when possible: This minimizes the fading caused by UV rays.
- Invest in a quality ceramic coating: No, this doesn’t need to be as expensive as you think! Check out our guide to ceramic coatings here, and consider treating your paintwork to a rock-solid ceramic shield. Not only will it protect your paintwork from damage, but it will also give it a gorgeous shine that will have your neighbours’ jaws hitting the floor!
However, maybe it’s too late, and you’ve already fallen victim to the dreaded swirl marks. If so, Reverse: Car Scratch Protector & Swirl Mark Repair will do a great job of restoring your paintwork. Check out our full guide on how to use it.
Enjoy Decals On Your Car? Here’s How To Make Them Less Stressful To Remove In The Future
Just a little planning in advance will make any of the above removal methods easier. Take some simple steps beforehand, and you can decorate your ride however you like, knowing that you’ve already got a head start on the work later on.
Apply Wax First
Applying wax before you place the sticker is a great way to reduce the glue’s vice-like grip on your window or paint.
The trick is to apply the wax and then apply the sticker before buffing the wax. It’s a simple solution that still leaves enough sticking power to keep the decal in place, but reduces the time required to spring it loose later on.
Place Stickers on Windows, Not Bumpers
Windows are a relatively hassle-free place to put stickers. We can safely use razor blades, vinegar, or even petrol and white spirits on glass. These harsher methods will make sticker removal a far quicker and less delicate job. So, maybe take a moment to consider whether that new sticker needs to go on the paintwork or if it could have the same impact on the window.
Carefully formulated to ATTACK the stickiest substances, Sap Attack gets rid of stubborn tree sap, tough tar, old bumper stickers, bugs, gum and asphalt. Works quickly to break down the contaminants and allow for easy removal.
Summary: Everything You Need To Know About Removing Stickers From Cars
Sticker removal is notorious for being more trouble than it’s worth, but the truth is that most people just don’t know how to do it!
Sure, they will definitely cause some extra work. However, if you’re itching to decorate your ride or to restore it to its original state, go for it! The information here gives you everything you need to know how to prevent potential problems and minimize the work involved. Besides, let’s be honest - since when did we mind putting in a little effort to make our car look its best?


