Does your engine have a hard time firing up? Do you need to jump start your car once every couple of months?
This can be a serious problem with the electrical system, the ignition system, malfunctioning sensors in the engine, a fried ECU and a bunch of other expensive electrical components.
★★★★★ "Saw this being promoted on a big YouTube channel and thought why not try it. Was a bit skeptical but WOW. Super easy to apply and car is shining. Water still pelts off 3 weeks later! Gonna ditch the wax and will continue to use." - Josh S.
OR, it could just be your vehicle’s battery playing tricks whilst being a new battery. The battery is the unsung hero that starts your engine every time you turn the key, but it rarely gets any attention, especially if it’s neatly tucked away under a plastic cover.
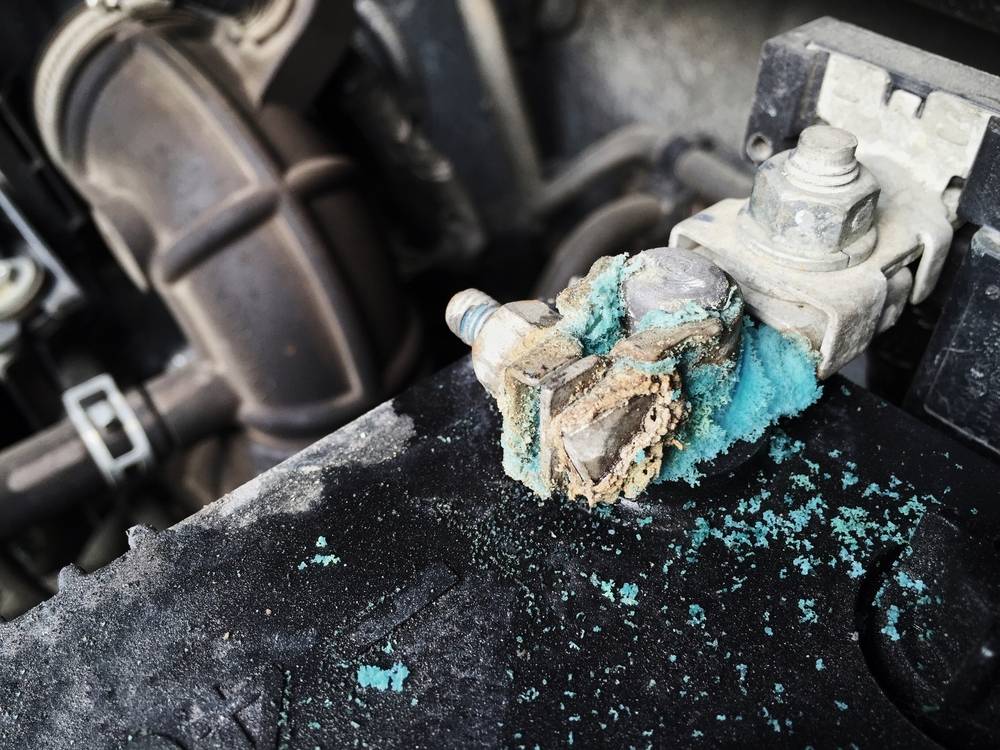
Out of sight, out of mind, right? Well, if your car’s electronics are acting up, we bet that taking that cover off will reveal a pretty nasty picture. A serious amount of corrosion - blue or white residue covering your battery posts and car battery terminals.
It looks really bad and it’s pretty toxic, but thankfully battery corrosion is easy to fix with household items like baking soda, cup of water and an old toothbrush. It’s often the part of the car wash process that gets forgotten too.
In this article, we’re taking a deep dive into car battery maintenance and cleaning. You may just fix your car for free so stick with us.
Recommended Video Below: This Ceramic Car Wax Gives You Showroom Shine in 20 Minutes
How Acid Lead Batteries Work
Most cars on the roads today have a lead acid battery. These are fairly reliable, work in pretty much any atmospheric conditions and last several years, before they are diminished.
A lead acid battery consists of a plastic housing that has 6 individual compartments or cells. Each cell contains a stack of even numbers plates. Half the plates are made from lead oxide (PbO2) and form the positive pole (cathode). The other half are almost pure lead and form the negative pole (anode). The plates are submerged in a mixture of sulfuric acid (H₂SO₄) and distilled water (H2O), referred to as an electrolyte.
A chemical reaction occurs, producing negative charges (electrons), which collect in the negative (anode) plate. These negative charges are attracted to the positive plate (just like magnet poles), but plates are separated from each other and the electrons can’t travel freely through the electrolyte.
The battery’s negative and positive cables connect to either end of the wiring harness in your car. When you turn the key, the circuit is completed and the stored electrons race through wire, power the ignition, dashboard, infotainment, and all other electrical devices, then finish at the opposite end of the battery to join the positive plates.
As you draw power from the battery, the chemical reaction replaces the sulfuric acid in the electrolyte with pure water, while sulphate scale buildup is on the surface of the plates. Eventually, the reaction will run out of steam, your battery will deplete and you will no longer be able to start your car or run other electronics.
Thankfully, the reaction is reversible. If you run a current through the battery, it will restore its initial state. This is done via the car’s alternator, which converts mechanical energy from the crankshaft’s rotation into AC electricity, which is converted once more to DC electricity to recharge the battery.
Eventually though, every battery will diminish and will need to be replaced - on average every 3-5 years. That said, proper maintenance and exploitation (both of which are next to free) will increase the life of your battery, reduce your running costs and reduce hazardous waste that ends up in the landfills.
Why Do Battery Terminals and Posts Corrode?
Okay so we learnt how the battery works. None of it explains all that corrosion that we see on the posts and terminals.
The chemical reactions in a battery are never 100% perfect. When charging the battery via the alternator, the reaction is forced to run in reverse and in the process a small amount of hydrogen gas is emitted and vented through the battery’s ventilation system.
As it’s vented out, hydrogen will react to the lead battery posts and copper terminals of the wiring harness and cause them to corrode, accumulating a white or bluish powder - predominantly on the positive end.
Older batteries that are near the end of their life span, damaged or malfunctioning, can vent excessive amounts of H2 as well as other gasses like hydrogen sulfide (H2S) or sulfur dioxide (SO2). Problems with overcharging or a malfunctioning alternator can also produce large amounts of this gasses. All of them are corrosive.
The corrosion inhibits the proper contact between the posts and terminals, disturbing the power transmission from and to the battery. Your battery may become unable to supply the necessary electricity to start your engine or power other electronics. It might not charge properly or have reduced capacity.
Working in this state for prolonged periods can deplete the electrolyte and cause the battery to diminish faster or malfunction.
Hydrogen is highly combustible and excessive emissions can end up in an electrical fire or a battery explosion, ejecting sulfuric acid all over your engine bay. You don’t want to be leaning over when that happens. So frequent inspections are recommended to ensure you catch warning signals early.
How To Clean Battery Terminal Corrosion
Okay, let’s get to work cleaning that battery.
Safety Gear On - It’s Acid
First things first, put safety gear on - safety glasses and gloves are mandatory. You’re working with acid residue which can cause irritation and burns.
Don’t let it touch your skin or eyes. If that happens, wash immediately with plenty of water and seek medical help ASAP.
In any case, don’t smoke around the battery and eliminate all possibilities of sparks and arching, which may ignite any amount of hydrogen that’s venting from the battery.
Inspect the Battery First
Before you do anything else, inspect the battery. Obviously, we’ll address the post and terminal corrosion, but look for other signs of damage - cracked plastic case, electrolyte leaks, damaged battery cables leading to the battery terminals.
If the outer case of the battery is damaged and leaking, you need to replace the battery immediately. If the engine bay smells like rotten eggs, there’s sulfur dioxide venting from the battery, which is a sign of malfunction, however, it may be caused by the improper connection, so don’t throw away the battery yet.
If the battery is very hot, which is caused by improper charging or over charging, let it cool down before you do any work on it.
Remove the Battery Or At Least The Cables
Disconnect the battery by unbolting both terminals. ALWAYS start with the negative terminal, then the positive one. When reconnecting, always start with the positive side, then the negative.
The negative terminal is the first one off and the last one on. The other way around can produce sparks.
If the battery is very dirty, it’s best to take it out of the car entirely so you can clean it and it’s mounting location more easily.
Removing Battery Acid Residue
Removing the acid residue is actually very easy. You need to neutralize the acid (low pH) with a base (high pH). Thankfully, you have one in your home - baking soda.
Simply mix half a cup of water with a tablespoon of baking soda. Then using a paper cloth or an old wire brush, apply it over the posts and terminals. It should begin fizzing, which is an indication the reaction is working. Rub the posts and terminals well and wipe all the residue off. It’s best to use a paper towel or a sacrificial rag - you don’t want to keep this stuff around - neutralized or not.
Finally, wipe the battery with a wet cloth. If there is grease and grime accumulated on top, you can use a small amount of degreaser to remove it. Alternatively, dish detergent should also work.
Just remember that you don’t want to pour water or liquid over the battery. Some of it can seep through the vents or seals and contaminate the electrolyte which will reduce the performance of the battery.
Alternatively, you can use one of the many available battery cleaning solutions. These are formulated exactly for this purpose and some of them have a color-changing effect that indicates the presence of any acid residue. These are fancy and work great, but are not absolutely required to get the job done.
There may still be some signs of corrosion and scale left on both the posts and the terminals. Use a ScotchBrite pad, a piece of sandpaper or a brass brush to scrub them free of any corrosion and oxide on the surface. Don’t be afraid if you see scratches on the posts - lead is soft so it will scuff up easily, but that won’t ruin the connection at all. In fact, exposing the clean metal will improve the conductivity.
Alternatively, there are special battery cleaner brushes, which have a cylindrical end for the copper terminals and a ring section for the lead posts. These are nice and usually cost just a few dollars, but again, not absolutely required for the job.
Sometimes, the copper terminals have corroded too much. They can easily be replaced and cost $5 - $10 dollars for the pair at pretty much every auto care center.
Replace the Felt Insulating Pads
Your battery should have a couple of ring-shaped felt pads that sit on the posts and insulate the terminals from the case and block any gasses that penetrate the post seals.
Overtime, they wear out or become saturated with oils, grease and other conductive materials. The pads cost a few dollars for a whole bag and should be replaced any time you’re doing maintenance on your battery.
Assembling the Battery
If you took the battery out, take a minute to clean it’s housing and surrounding surfaces. Check out our engine detailing guide for more information on how to take care of your engine bay.
Connect the positive terminal first. Then the negative one.
Also, don’t forget about the battery hold down clamp. It’s important to keep a heavy object, such as a lead acid battery securely in place.
Use Dielectric Grease To Protect The Terminals
After you reassemble your battery and tighten the terminals, coat the terminals and posts with dielectric grease. This paste insulates the connection from moisture and other gasses, preventing corrosion and contamination.
WARNING: Don’t get dielectric grease between the posts and terminals! It’s an insulator and will prevent an electrical connection. Only apply it on the outside, after assembly is finished.
Another proven product is petroleum jelly, which works in a similar fashion, but will emit combustible gasses when hot. So consider your battery location in relation to hot surfaces in the engine bay - headers, turbos, etc.
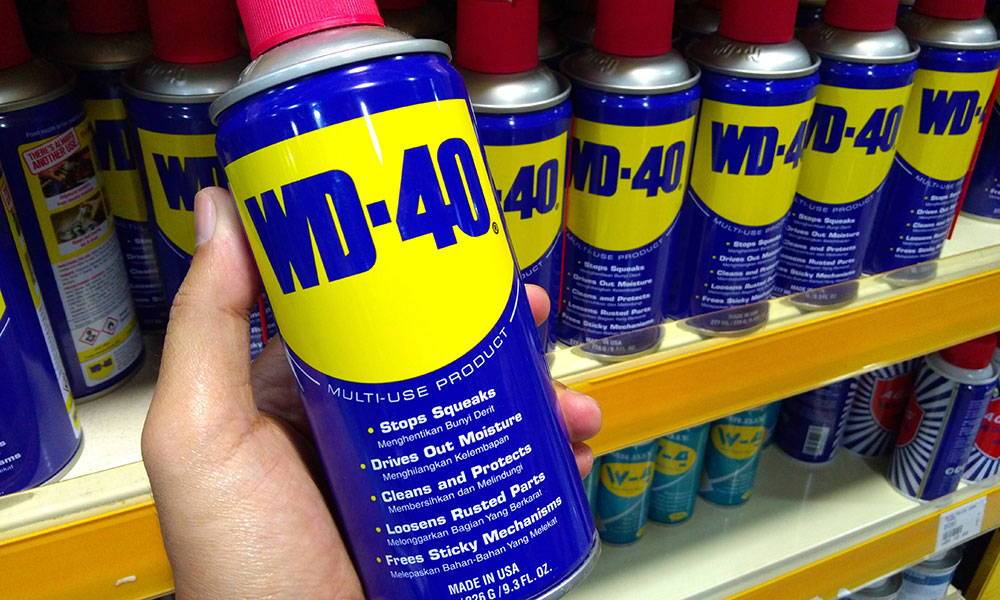
If you have nothing else, put some WD-40 over the connection - it should help reduce corrosion.
Checking Battery Health With a Multimeter
Last but not least, here are some tips for battery maintenance.
Measure Battery Voltage
If you don’t have a digital multimeter already, it's an invaluable tool when testing and diagnosing any electrical circuit in and out of your car. You can also use it to test the health of your battery.
Turn the car off, switch the headlights and any other electronics off and remove the key.
Set the tool to 20V and direct current - DC. Then, touch the positive probe to the positive post and the negative probe to the negative post. The read out should show at least 12 Volts.Any lower than 12V is an indicator your battery cannot hold a charge.
Each cell in your car battery generates around 2.1 Volts of direct current. The cells are connected in series (negative to positive) so a normal healthy battery should produce a total of 12.6V DC.
Next, leave the probes connected and start the car. The multimeter should show 10Volts or higher while cranking. Cranking the engine draws a huge amount of current, so the voltage will drop, but it shouldn’t drop below 10V.
With the car running, the voltage should rise above 13V - ideally 14+ Volts. Under normal operation, the alternator will produce current to charge the battery. The voltage should be higher than the voltage of the battery to reverse the chemical reaction and charge it properly.
If you’re seeing 15V or higher, it’s a sign your alternator is overcharging your battery. This can be a serious issue, and you should visit a mechanic whenever possible to diagnose further.
Battery overcharging will get the battery very hot and boil the electrolyte, causing it to vent gasses, increasing corrosion and diminishing the battery’s life. The worst case is a battery explosion, which you want to prevent at all cost.
Check for Voltage Drop and Surface Drain
An improper connection can drain your battery over time. Dirt on the surface of the battery can become conductive and drain your battery as well.
Using the same multimeter settings, check for voltage drop between the posts and the terminals and between the posts and the top surface of the battery case. Any voltage on the screen means you’re leaking charge, which means your battery is draining constantly.
A proper clean up session should fix that problem, but if it doesn’t your battery may be malfunctioning and needs to be replaced.
★★★★★ "Saw this being promoted on a big YouTube channel and thought why not try it. Was a bit skeptical but WOW. Super easy to apply and car is shining. Water still pelts off 3 weeks later! Gonna ditch the wax and will continue to use." - Josh S.
Conclusion
Alrighty, what have we learned about car batteries? They are pretty stout and typically last 3-5 years. They are invaluable for the normal operation of your car, but are often neglected and mistreated.
Battery corrosion is a one of the leading causes of problems with the ignition and other electronics in your car. Severe corrosion is a sign of malfunctioning battery, but is also expected in their normal exploitation cycle.
It’s pretty dangerous for the skin and eyes and should be handled with care, but battery corrosion and acid residue is really easy to clean.
Proper care and maintenance can improve the performance of your battery and increase its life significantly.


