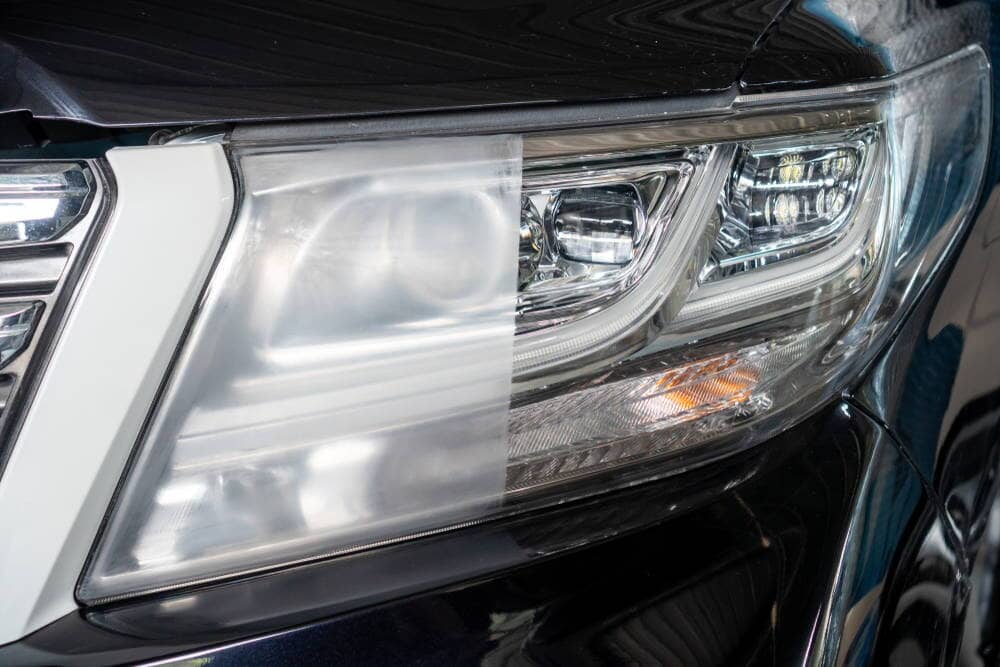
Yellowed and oxidized headlights are an eyesore!
They make your car look ten years older, and more importantly, can become a safety hazard during nighttime driving and inclement weather conditions. We’re going to take you through a step-by-step guide on how to properly clean your headlights back up to a factory finish, all while busting out some odd DIY headlight restoration methods like toothpaste and WD40 headlight restoration!
Torque Detail Ceramic Spray is a revolutionary spray-on ceramic coating that provides shine, protection, and water-repelling properties to the body of your car, windows, wheels, and yes - Your headlights. "Product provides a deep shine that's very impressive! It even cleared up my headlights."
The Proper Way To Clean Headlights
Let’s not waste any time. You came here to learn how to restore headlights. Let’s restore them.
Headlight restoration is a simple process, but without the right products and tools, you won't get the professional results you’re looking for. The below list will provide you with all the products and tools you're going to need to archive great, long-lasting results!
Tools:
- Microfiber towels
- Automotive masking tape
- Bucket of water
- Spray bottle
- Sanding block (Could simply use a block of wood like this)
Optional Power Tools:
- 3-inch DA polisher
- Polishing pads
Note: We at Torque Detail take pride in teaching people how to take care of their vehicles without fancy equipment. However, most pro detailing shops will use such power tools to speed up the process and bring uniform results every time.
Products:
- Ceramic Spray - Spray-On Ceramic Coating
- Reverse: Scratch Remover
- 800-grit sandpaper
- 1500-grit sandpaper
- 3000-grit sandpaper
- Soapy water (We used Decon Soap + water)
- Isopropyl alcohol
Step 1.) Clean the surface of the car headlights
Using some soapy water (Decon soap + water) and a microfiber towel, clean the headlights and their surrounding areas.
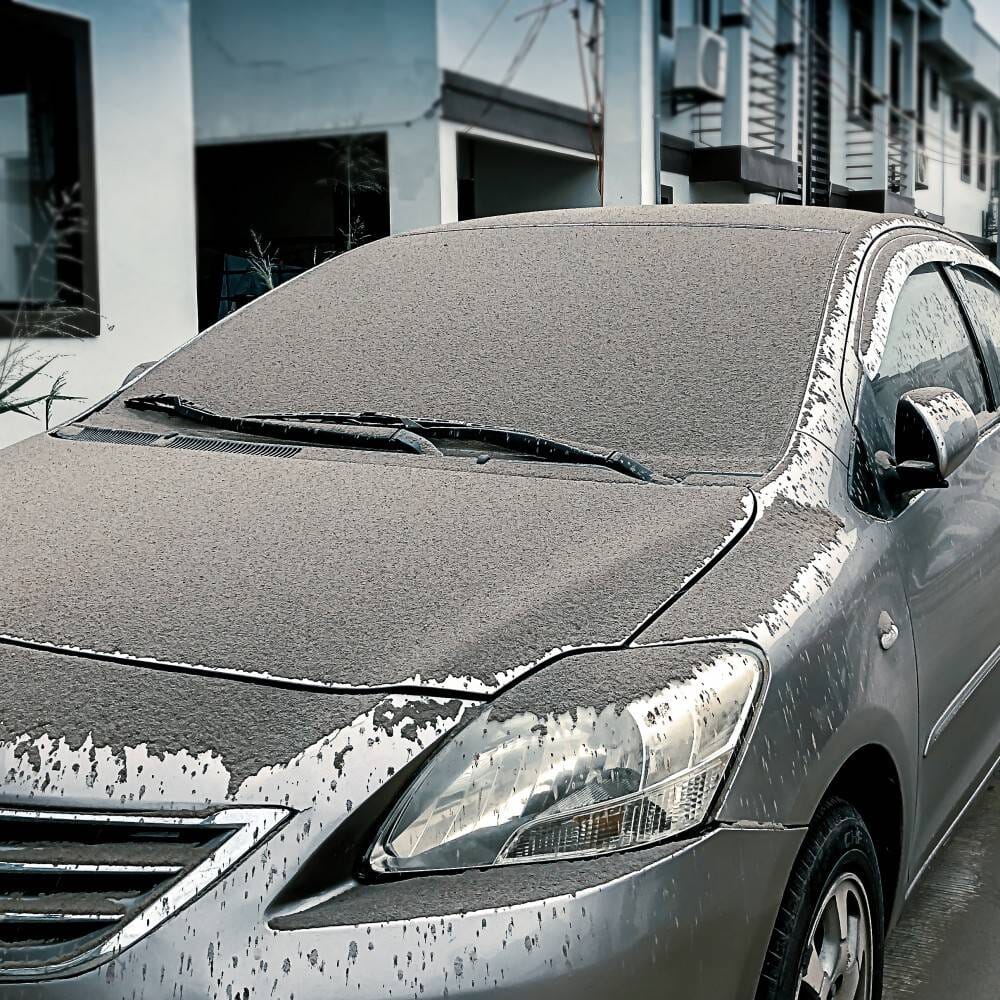
Bug guts and dirt will get in the way of the wet sanding process, so make sure your headlights are as clean as possible for the following steps.
Step 2.) Tape the area surrounding the headlights
After cleaning the headlights and surrounding areas, use some automotive masking tape to mask around the headlights.
You want to make sure you get good coverage and cover the edges of all the paint, chrome, and plastic pieces. This will prevent you from causing any damage or accidentally wet sanding any of these areas.
Step 3.) Prep your wet sanding material
Soak all your wet sanding paper in a bucket of water, making sure to let it sit there for a few minutes. This bucket of water will also help you clean your sandpaper in the following steps.
Step 4.) Remove the heavy oxidation
Time to grab your 800-grit sandpaper and wet sand the hazy oxidized clear coat and plastic from the headlights.
To be safe, as you sand, continually spray more soapy water on the surface of your headlight to keep the sandpaper lubricated at all times and prevent it from drying out.
Don't worry - it’s okay if it gets messy! After the headlight is soaked, grab your 800-grit sandpaper with a sanding block and start wet sanding the headlight in slow left to right motions.
Light pressure is all that's required - if you push too hard, you could potentially scar the plastic. You’ll notice after a few passes that a milky and yellowish residue will appear. This residue is just the old hazy clear coat and plastic coming off the headlight.
After every eight to ten pass-throughs, clean off the surface and repeat the process in cross-hatching motions, while making sure to clean off the residue and apply fresh soapy water to keep the headlight lubricated.
Step 5.) 1500 and 3000 grit finishing stages
After wet sanding all the old clear coat and yellowed plastic from the headlights with 800-grit sandpaper, switch to your 1500-grit, then your 3000 grit, and repeat the same process of step four. The goal is to see a nice consistent haze on the surface of the headlight after the wet sanding.
Step 6.) Compound the wet sanding marks from the headlights
By Hand Instructions:
If you’re compounding by hand, grab your microfiber applicator pad and apply 3 to 4 pea-size drops of automotive compound. In circular motions, start polishing the surface of the headlight with light to medium pressure, then begin wiping off the excess compound from the headlight with a microfiber towel.
You might have to repeat this process until the wet sanding haze is completely gone.
Machine Instructions:
If you have a machine polisher like a 3-inch DA, apply 3 to 4 pea-size drops of automotive compound on to your polishing pad, then spread the polish evenly over the headlights. Keep your polisher around level 3 to 4 and compound the surface until all the wet sanding haze is removed.
Step 7.) Polishing to a high-gloss shine
By Hand Instructions:
After removing all the wet sanding haze with a heavy cut compound, it's time to polish the headlights to a factory high-gloss shine.
If you’re polishing by hand, grab your microfiber applicator pad and apply a little bit of Reverse Scratch Remover. In circular motions, start polishing the surface of the headlight with light to medium pressure, then wipe off the excess polish from the headlight with a microfiber towel.
Machine Instructions:
If you have a machine polisher like a 3-inch DA, apply 3 to 4 pea-size drops of Reverse or a traditional automotive polish on to your polishing pad, then spread the polish evenly over the headlights. Keep your polisher around level 3 to 4 to polish the surface to a high-gloss shine!
Step 8.) Prep the headlight for ceramic coating
Now it's time to protect all the hard work you put into restoring your car's headlights! The first thing you’ll have to do is remove all oils and residue from the wet sanding and polishing process. Grab your IPA (isopropyl alcohol and apply a liberal amount to a microfiber towel, then clean the headlight and its surrounding areas until all the residue has been removed.
Step 9.) Apply your ceramic coating
Whether you’re using a wax, sealant, UV film, or ceramic coating, this is the perfect time for you to apply your form of protection.
Ceramic Spray works beautifully for this and is easy to apply. Spray your headlight with Ceramic Spray. You don’t have to use a lot of it to get the job done believe it or not.
Then, in overlapping cross-hatching motions, apply the coating to the headlights using a clean microfiber towel (Not the same one you’ve used for the polish). Buff in the coating using the microfiber towel until you get your desired result.
Step 10.) Remove the masking tape and enjoy the results!
Remove all the masking tape from the car and enjoy your brand-new and protected headlights!
Professional Results; Easy Application
Ceramic Spray by Torque Detail
Ceramic Coat everything! The body of your vehicle, your headlights, exhaust tips, windows, wheels, and more! Get started today.
Frequently Asked Questions About Headlight Restoration
Why Do Headlights Oxidize?
Just like your car's paint, headlights have a protective barrier called clear coat. After a few years, your headlights take a beating from the sun, physical abrasion, and dirt, which causes the plastic to yellow and oxidize. In order to properly restore headlights, you have to remove the old yellowed clear coat from the plastic underneath. In order to properly and safely remove the old clear coat, wet sanding will be required.
What Is Wet Sanding?
Wet sanding is the process of abrading a surface using sandpaper and a lubricant like soapy water. The soapy water keeps the surface cool and lifts particles away from the headlight. Without the liquid, material can build up in the sandpaper and leave behind scratches that are larger than the size of a particle, ruining your finish.
Clear Coat Vs. Ceramic Coating
After wet sanding and polishing your headlights to a factory shine, it’s recommended to add protection to prevent yellowing again. Clear coating headlights has been a standard for headlight restoration for years, but will require you to have a controlled area to prevent overspray. Furthermore, aftermarket clear coats have a tendency to chip and peel a few years after installation.
Because of these limitations, many individuals try to protect their headlights with waxes and sealants. These two options work but can only provide a few months of protection from harsh UV rays and contamination.
So if clear coating your headlights is difficult and waxing them only offers a few months of protection, what other options do you have to protect your headlights? With the advancements of technology, enthusiasts and professionals alike have moved to ceramic coatings as an alternative for ease of use and long-lasting results. A quality ceramic coating will provide a semi-permanent barrier and years worth of protection, all without having to deal with overspray and peeling later down the line. We therefore highly recommend ceramic coating your headlights because of the numerous advantages!
UV Film
A recent trend in headlight protection has been UV film, a plastic film that’s applied over a restored headlight that will permanently protect it from any future oxidation. This is the longest-lasting form of protection, but it’s difficult to purchase and takes some skill to properly cut and apply to headlights.
Do DIY Headlight Restoration Kits Work?
Headlight restoration kits can easily be found at your local automotive store from multiple reputable manufacturers. These kits come with everything you need to restore your headlights to a factory finish. Of course, the quality, process, and end result depend on the kit you purchase, as well as the current condition of your headlights. Some kits are made for only slightly yellowed headlights while others are for extremely oxidized headlights, so make sure to examine your headlights in order to purchase the correct kit for your needs. Let’s go over what each kit contains for each situation:
Mechanical Headlight Restoration Kits: Extremely damaged headlights
These kits are perfect for extremely damaged headlights! If your headlights’ clear coat is peeling off or is so hazy to the point of becoming a safety hazard, mechanical headlight restoration kits will provide you the best results. We refer to these kits as mechanical because they provide a variety of sandpaper, sanding blocks, and polishes, which all mechanically abrade the hazy headlight to almost new condition. With these kits, you would start by cleaning the headlight with some soapy water, then wet sand the headlight with the sandpaper and block provided with the kit. After you achieve an even haze on the headlights, you would use the headlight polish that comes with the kit to remove the haze, restoring the headlight to brand-new condition. In order to protect all your hard work, the final item usually found in these kits is a headlight coating or sealant that’s applied with an applicator pad. All in all, these kits require a bit more experience and patience but work well if used properly.
Chemical Headlight Restoration Kits: Lightly damaged headlights
Chemical headlight restoration kits are perfect for those slightly yellowed headlights. They usually come in a wipe format that allows you to chemically remove the yellowed top layer of clear coat from the headlight, revealing a fresh layer of clear coat underneath. The restoration wipes are usually found in small pouches. After grabbing the wipe, use it to wipe the headlights evenly until all the yellowing is removed. After that point, add some protection to the headlights with a wax or sealant to prevent any further oxidation.
Testing The Odd Methods: Do They Work?
Just like everything else detailing-related, enthusiasts are always looking for cheap and easy DIY methods, and headlight restoration is no different. There are a lot of odd DIY headlight restoration methods online, so let's check out the effectiveness of some of the most popular of these.
The Toothpaste Method
Because our teeth need a quality deep clean every day, toothpaste incorporates very light abrasives to remove plaque from the surface of our teeth. So in theory, toothpaste can polish out the lightest of yellowing and oxidation. However, be prepared, because you're going to need a lot of elbow grease to make any visible difference in your headlights!
The WD40 Method
WD40 has also become a popular DIY headlight restoration on the cheap, but sadly, this doesn't last long and can only restore slightly yellowed headlights. The silicone-based lubricant in WD40 merely fills the pores of the oxidation, mimicking a freshly polished headlight, but in reality, after a few weeks, the silicone dissipates and you're left with the same old yellowed headlight!
The Baking Soda And Vinegar Method
Similar to the toothpaste method, the baking soda and vinegar method uses the polishing power of baking soda to cut through the oxidation and the cleaning power of vinegar to remove the embedded dirt and grime in the headlights. This combination basically makes a makeshift DIY polish, but again, just like toothpaste, it has its limits.
How To Restore Glass Headlight Lenses On Classic Cars
Unlike modern-day vehicles, classic cars are typically found with glass headlights, which are far more resistant to fading and do not yellow like plastic headlights.
However, even though glass headlights don’t yellow, they can become dull and hazy over time due to contamination and physical abrasion. If glass headlights are too far gone, it’s recommended to just replace them with a new set. Unfortunately, for some classic cars, that might not be an option! So, here’s a step-by-step guide on how to restore glass headlights.
First things first, give your car a wash to get off any dirt and use some glass cleaner to attempt to clean the headlights. If that does not do the trick, you can try the below, more advanced method.
Step 1.) Clean the surface of the headlights
Using some soapy water and a microfiber towel, clean the headlights and their surrounding areas. Bug guts and dirt will get in the way of the wet sanding process, so make sure your headlights are as clean as possible for the following steps.
Step 2.) Tape the area surrounding the headlights
After cleaning the headlights and surrounding areas, use some automotive masking tape to mask around the headlights. You want to make sure you get good coverage and cover the edges of all the paint, chrome, and plastic pieces. This will prevent you from causing any damage or accidentally wet sanding any of these areas.
Step 3.) Machine polish the headlights with automotive glass polish
Because glass is much harder than plastic and paint, a machine polisher along with dedicated automotive glass polish will be needed. Apply 3 to 4 pea-size drops of automotive polish onto your polishing pad, then spread the polish evenly over the headlights. Keeping your polisher around level 3 to 4, polish the surface to a high-gloss shine!
Step 4.) Prep and apply protection if desired
Unlike plastic headlights, glass headlights don’t yellow or oxidize, and instead stay looking new for years after restoration. However, you’re more than welcome to add a form of protection like a wax, sealant, or glass ceramic coating for more shine and ease of cleaning later down the line!
Cleaning Headlights: Simple Process With Amazing Results!
As you can see, not every headlight restoration method is the same, which is why we recommend the efficient and true step-by-step process used by professionals across the country. Rather than spending hundreds of dollars on a new set of headlights, a few easy-to-buy items and an afternoon to yourself is all you need to make those yellow and hazy headlights look brand-new! Headlight restoration is a great skill to have for friends and family, as not only can you make a few extra bucks by restoring headlights, but it’s also super important for the driver’s safety and other drivers on the road!


